Pottery
Pottery @ ENTS
- Studio Guidelines
- Glaze Recipes
- Randy's Clear glaze Recipe
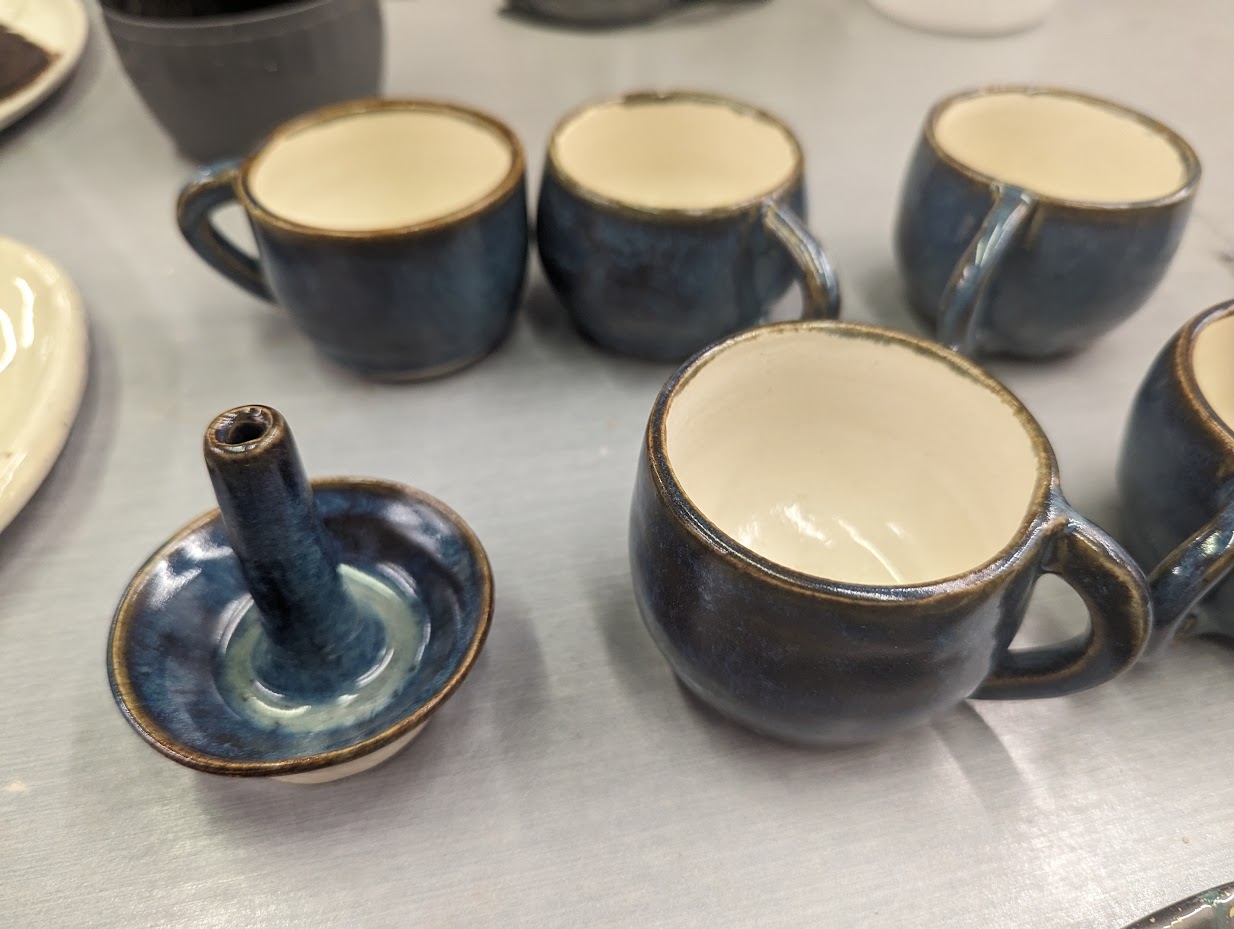
- AB Slip Blue Rutile Plus Cobalt Carb
- Red Oilspot
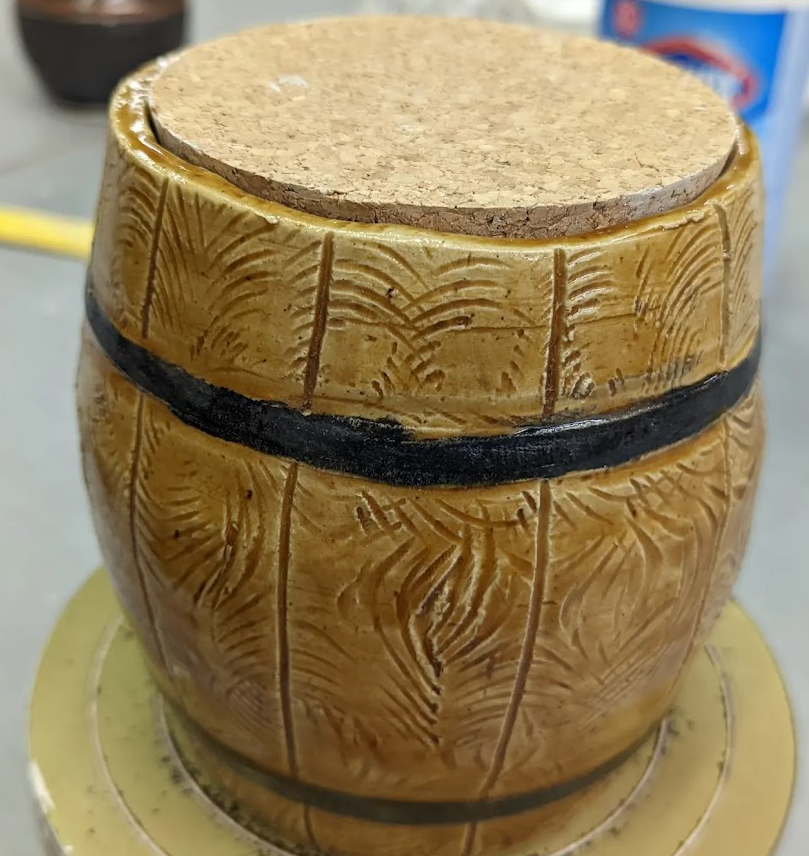
- Honey Wheat
- G3806F - Fluid melt clear
- Processes
- Kilns
Studio Guidelines
Welcome to ENTS Pottery Studio!
We’re thrilled to have you join our community of artists and pottery enthusiasts.
This guide is an intro to the space and intended to make things accessible for the member who is brand new to pottery and contains information and norms for people who have more pottery experience. ENTS is a makerspace and welcomes the contributions and expertise of all studio users. If there’s anything in the guide that you’d like to add to or revise, please connect the Pottery Committee.
Best practices in the space:
-
Communal effort. ENTS is completely member run. The more we pitch in, the better the space is.
-
No dry sanding (wet your piece while sanding, or your sandpaper if sanding greenware)
-
The space should be as clean or cleaner than how you found it
-
Mop floor and setup ‘Wet Floor’ sign to avoid potential slips, trips and falls .
-
Sign your name and pottery mark on the sheet near the glaze and bisque carts
-
You will be assigned 2 spaces, 1 for a storage bin, and 1 box of clay.
-
You will have a choice of using solely the communal greenware work in progress shelves (ideal for those that are at the studio infrequently, make only a few things in any given week or mainly models/carves 1-2 pieces) or have an assigned greenware work in progress shelve (ideal for those at the studio frequently and have a number of pieces in progress in any given week). The overflow spaces are for the rare occasions that you exceed your shelf space.
Clean up! Dust from clay, dried glaze, and sanded ceramics is dangerous and long term exposure to it can cause irreversible lung damage and a condition called silicosis. It’s crucial to clean up after you work. Please don’t dry sand in the space (if you have to sand a fired piece, do it wet).
Wipe down every surface you worked at with a wet sponge. Even if you think you didn’t leave any mess, there is almost always some clay crumbs or left over glaze. Use a spray bottle on the wedging table to help loosen leftover clay. If you use the wheel, you are required to mop around and under the wheel. When you empty your tray from throwing, put that water into the reclaim bucket. There’s important parts of clay (fine particles) in it that help bind the reclaim.
After glazing, wipe down the rim of the glaze jar so it's easier for the next person to open. If you aren’t able to open a glaze bottle, run the rim upside down under warm water and wait a minute or two for the glaze to soften.
Wash all the tools you used and set them to dry. Empty the drying rack and put away tools and containers left there. Rinse sponges and set them to dry.
Aim to leave ENTS cleaner than when you arrived
Notifying the Board of Directors if any supplies are running low, anything that is broken or no operating the way it should. Requests for glazes, tools and other supplies can be submitted to the Pottery Committee for consideration. The Pottery Committee will provide the Board of Directors with a request.
Equipment use and instructions
The wedging table
- Scrape off all of the clay and remove as much clay as you can
- Spray down with water and wipe with a wet sponge
- When the table dries there should not be dried clay
- We have 2 wedging tables, one for lighter coloured clay (370) and one for darker clay (M390, coffee clay). If you are wedging white clay, clay with mason stains, or porcelain, you may want to use the separate wedging boards to prevent contamination. Clean the wedging boards as you would the table.
Glaze and work tables
- Wipe and wash surfaces with a wet sponge, there should be no evidence of glaze or clay left on the table
- Put away any items you’ve used
- Completely wipe down banding wheels if used.
Wheels
- With a wet sponge, clean the wheel head, detach ( if possible for the wheel) and wash the splash pans, sides of the wheel and the foot/ pedal.
- Utilize the clay recycling buckets (if you can, please drain some water from the
pans prior to dumping into the recycling buckets), ensure you are using the
bucket that corresponds to the clay that you are using i.e. Dark clay, e.g Red
(M390) and Coffee. Light clay, eg. buff (M340), speckled buff (M340S), White
(M370), etc.
- IMPORTANT: the slip that’s created from throwing is necessary for the reclaim to be of good quality. This slip contains the finest particles of the clay body and ensures the reclaim is smooth and easy to work with.
- Wipe down the wheel and table top
- Turn off and unplug wheel
- Place foot pedal on table surface
- Mop area around and under the wheel
- Wipe down walls as needed
Extruder Watch: How To Use A Wall Mounted Clay Extruder
- Take the extruder apart and wipe down the all pieces with a wet sponge.
- Pay special attention to cleaning the inside of the extruder that is attached to the wall.
- Plunger and housing should be free of clay.
- Put plunger and housing back together
- Place pieces and extruder die back in the their storage box
Slab roller Watch: How To Roll Out Clay In The Slab Roller | Pottery For Beginners | Troy Made It (ours is slightly different)
- Used correctly, there should be no clay on the slab roller, if there is clay on the roller, wipe down with a wet sponge. Wipe down the canvas with a wet sponge and hang to dry.
- Make sure you use the correct canvas. They are marked for white or dark clay.
- Occasionally the canvas needs a better cleaning, rinse in the ENTS sink and then take home and run it through a washing machine and hang to dry.
Sink
- If items are dry please place them in correct locations before washing your items
- Spray the loose clay into the sieve
- Clear the sieve of loose clay and rinse the sink
- Wipe down taps as needed
Heating/ drying utensils
- Hairdryer- unplug and put away
- Space heater - turn off and unplug after use
Storage
Make sure you write your name and date on your clay box, storage bin and greenware work in progress shelve or individual pieces on the communal and overflow shelves.
Glazes and Clay
Communal glazes
ENTS has a glaze library available for members to use. These glazes are contributed by members and it’s asked that members who use the glaze library are regularly contributing glazes.
- Wipe the outside of the jar, the rim, and the lid after use.
- To reduce dust and make opening jars easier, hold the jar upside down and run water over it, or submerge the top of the jar in water for 30 seconds.
- In the case of any communal buckets of dipping glaze, mix well before dipping, and wipe the inside of the bucket clean down to the level of the glaze. If the glaze consistency is too thick, mixing may help. Don’t add water unless you’ve checked with someone who made the glaze.
- When you apply glaze to your bisqued piece, make sure there is no glaze on the bottom where it will touch the kiln shelf. When glaze is fired, it turns into glass and anything it’s touching will fuse. It can cause damage to your piece, other pieces, or the kiln shelves.
- It’s recommended that everyone use cookies to fire. Especially if you are using a glaze you are unfamiliar with or combining two or more glazes, please always use a cookie.
Personal glaze
Members purchase glaze from Plainsman and a variety of online vendors. When purchasing glaze, check what cone it can be fired to. Look for cone 5-6 glazes.
Glaze can be affected by the placement in the kiln, what clay body it’s on, and if it’s layered with any glazes. Making test tiles can be helpful to find glaze you like.
If you are interested in commercial glaze combinations, there are several facebook groups that may be helpful. AMACO Cone 5-6 Glaze Forum Mayco Mud Room Society Spectrum High Firing Glazes
If you are unsure about any of your glazes or combinations, please reach out to the pottery committee or in chat.
Reclaimed clay ENTS has reclaim for member use. There are two available options. Red/coffee reclaim and white/grey reclaim. Note that the white/grey reclaim will have some amount of speckles (manganese) in it. Place clay scraps, wheel trays, and trimming into either the dark or light clay buckets.
Members reclaim the clay and use a pugmill to process it. Pugged clay is available in blue bins near the reclaim buckets.
Personal clay Most members purchase their clay from Plainsman Clay. For a list of clays that can be fired to cone 6, visit https://plainsmanclays.com/store/index.php?type=10&xyz=
Only commercial cone 6 or higher can be used in the ENTS Pottery Studio.
Community tasks/Pottery Chores
Printable list- Pottery Chores
Kilns and firing
https://bigceramicstore.com/pages/info-ceramics-tips-tip48_load_fire_kilns_part1#:~:text=The %20bottom%20layer%20of%20shelving,allow%20for%20expansion%20during%20firing. Bisque is fired to cone 04 and glaze is fired to cone 6. Read here for more information on what cones are. If you purchase glaze for yourself, make sure it’s midfire to high fire.
ENTS has two kilns. The smaller one with the red panel we call Jack. The larger one with the blue panel we call Jill. Typically we fire bisque in the smaller kiln Jack and glaze in the larger kiln Jill.
Only ENTS certified kiln loaders are authorized to load and unload the kilns.
ENTS does not have a kiln tech. Trained & certified members volunteer their time to load and unload the kilns and do kiln maintenance. Please contact the Pottery Committee to learn more on how to get certified.
Glaze Recipes
Randy's Clear glaze Recipe
You need about 10kg to fill a 5 gallon bucket. I would suggest you try a test first. I’ve been testing a similar clear base from “mastering cone 6 glazes” ;
Materials Amt
PPS Fusion Frit F-12 25.00
PPS Feldspar Custer Potash 22.00
PPS EPK 18.00
PPS Silica 295 mesh 26.00
PPS Talc Silverline 303 5.00
PPS Whiting (Calcium Carbonate) 4.00
Total: 100.00
I’ve modified it to change from frit 3134 to f-12 as 3134 may be very difficult to get in the future.
For every 100gm of dry materials start with 85 gm of water.
Date April 1 2024 - Will be setting up a small batch first as Randy suggests.
AB Slip Blue Rutile Plus Cobalt Carb
Recipe sourced from https://glazy.org/recipes/121839
Target SG is 1.45, this is a dipping glaze at that. It does tend to settle quickly, so mix well before you dip. It needs a fairly thick application, it can crawl a little or turn brown if it's not applied thickly enough.
This is a Cone 6 glaze
Recipe
| Material | Amount |
|---|---|
| 80.00 | |
| 20.00 | |
| Total base recipe | 100.00 |
| 4.00 | |
| 2.00 | |
| Total | 106.00 |
Red Oilspot
Sourced from https://glazy.org/recipes/36081
A cone 6 oil spot with red and black mottling
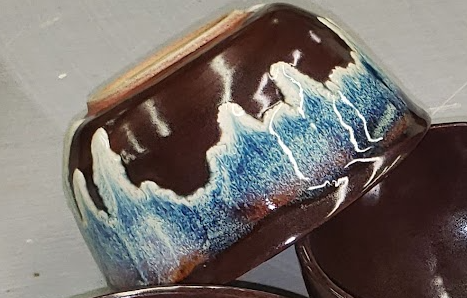
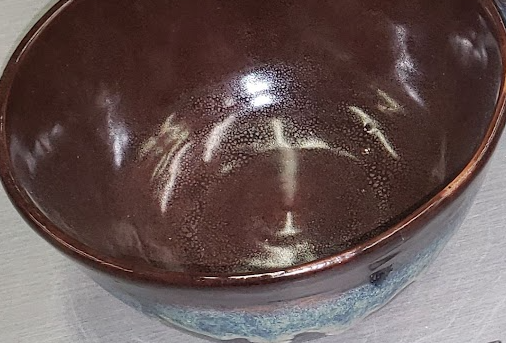
The inside is straight red oilspot. The running blue-to white comes from layering a band of Spectrum Running Hot Chowder over it. It sure is running, but that's probably my favorite combo!
Recipe
| Material | Amount |
|---|---|
| 25.91 | |
| 21.59 | |
| 15.11 | |
| 13.82 | |
| 6.91 | |
| 6.04 | |
| 6.04 | |
 |
4.58 |
| Total | 100.00 |
Honey Wheat
Sourced from
https://glazy.org/recipes/36974
Recipe
| Material | Amount |
|---|---|
| 30.00 | |
| 19.00 | |
| 18.00 | |
| 18.00 | |
| 10.00 | |
| 5.00 | |
| Total base recipe | 100.00 |
| 4.00 | |
| 2.00 | |
| 1.50 | |
| Total | 107.50 |
G3806F - Fluid melt clear
Taken from https://insight-live.com/insight/share.php?z=gbcM8HXmX2 via digital fire
I like this clear over underglazes, as it is a cone 6 clear that is designed to stay fluid at firing temperatures for a while to let out any offgasing bubbles from the underglaze. Microbubbles from offgasing make underglaze designs appear cloudy or gray, this keeps the colours a bit brighter. That link has a variety of different recipe versions, most of which include additives for color I don't use in the clear version for dipping.
|
Code # G3806F |
| Materials | Amt | |
|---|---|---|
| Silica | 23.500 | |
| Wollastonite | 7.000 | |
| Kaolin | 10.000 | |
| Strontium Carbonate | 5.000 | |
| Ferro Frit 3110 | 22.000 | |
| Ferro Frit 3249 | 21.000 | |
| Zinc Oxide | 3.000 | |
| Spodumene | 6.000 | |
| Bentonite | 2.500 |
Processes
Running a test fire
This page is a work in progress.
After some kiln repairs it may be required to run a test fire. Typically this will happen after a relay or element replacement to ensure the kiln is operating normally.
- Empty the kiln, if not already done.
- Place a shelf at each zone with pyrometric cones to record temperature.
- Each set of cones should consist of 1 below target temperature, 1 at target, and 1 above target.
- No other pieces should be fired.
- Run the kiln's program normally.
- Record the runtime and cone behaviour.
- Compare kiln performance against Expected performance.
- Make repairs and Troubleshoot as required.
Mopping
TL;DR
- Add hot or warm water and floor cleaner to mop bucket
- Mop the floors
- Ring mop and squeeze out excess water
- Drain mop bucket water into the shop sink (Not the bathroom. Not the toilet)
- Rinse bucket and drain water again
- Clean out the sink sieve and put back in the sink
- Admire the clean and dustless floor
Extended version
The water should be emptied daily, or more than once a day if mopping up a significant amount of clay or if the water is cloudy.
Using dirty mop water doesn’t remove dust from the space, but just moves it around.
Fill the mop bucket with water using the provided hose (on the wall near the washroom). Add in a splash of floor cleaner to help clean the floors.
After mopping, rinse and wring out the mop and set it in the mop basket on top of the pail.
Water can be dumped into the shop sink - NOT the toilet or any other sink. Ensure the sieve is in the sink so the pump is not pulling in debris
After dumping the mop water, remove debris from the sieve and throw it away. The water may have chemicals in it, so using gloves is recommended.
Rinse the mop bucket and leave the mop in the basket to air out
Leave the bucket empty. The next person to mop will refill with warm/hot water and floor cleaner
Note: mopping is a physically demanding job for some members. If you are unable to empty the bucket after mopping, that’s okay. We’re a team and we all contribute where we can, not everyone has to be a champion mopper.
Making cookies
Learn more about how to make those cookies here:
Part 1: https://www.youtube.com/watch?v=jIKIG26dlLc
Part 2: https://www.youtube.com/watch?v=6v3HJnTz-Rw
Kilns
Troubleshooting
Disclaimer
Do not perform troubleshooting without approval from the Board.
Manuals
Bartlett V6-CF Manual.pdf (Jill - Blue kiln)
Common symptoms for troubleshooting
- Firing duration is weirdly high
- Pieces are being fired inconsistently (some are over-fired, others under-fired, within the same firing)
If you think something is going wrong in the kiln, check the relays first!
Relays
- Disconnect power from the kiln
- Note the wiring (take photos)
- Remove the relays individually, testing them on the bench power supply
- 3 terminals will receive power
- Connectivity when power is supplied should be present through the remaining sets of terminals
- Verify the relay pinouts to be sure on which terminals are used
- Ensure all spade connections are tightly coupled. It should require fairly significant effort to disconnect the relays. Tighten with pliers as needed.
After replacing needed relays:
- Run a test fire
- At approximately 100 degrees Celsius, do a paper/heat test on each element to confirm operation
Kiln elements
- Verify that the thermocouples look okay, not damaged, and no pieces or shelves are too close (this could cause a false positive).
- Disconnect power from the kiln
- Open the front control panel
- Note the wiring (take photos)
- Remove the screw terminal connectors which attach to the elements
- Using a multimeter, record the resistance of all 6 elements
- If any of the 6 elements are more than 10% out of spec, replace all elements (values are recorded below)
Replacing elements:
- TODO
After replacing the elements:
- Run a test fire
- At approximately 100 degrees Celsius, do a paper/heat test on each element to confirm operation
Jill (blue coneart) expected resistance values
| Element |
Nominal |
In spec range |
| 1 (top) | 14.2 Ohms | 12.78 - 15.62 Ohms |
| 2 | 17.9 Ohms | 16.11 - 19.69 Ohms |
| 3 | 17.9 Ohms | 16.11 - 19.69 Ohms |
| 4 | 17.9 Ohms | 16.11 - 19.69 Ohms |
| 5 | 17.9 Ohms | 16.11 - 19.69 Ohms |
| 6 (bottom) | 14.2 Ohms | 12.78 - 15.62 Ohms |
Expected performance
This page is a work in progress.
Each of the kilns has an "expected" runtime and temperature behaviour. These characteristics are recorded below. If the real world values start to drift from these expected values, perform Troubleshooting.
Jill (blue coneart)
TODO
Jack (red skutt)
TODO